

Editing Basics
A quick run-through of the basics of editing a document with text boxes
Our editable documents are DOCX files created in Microsoft Word. These instructions are based on editing the document in Word.
Here is an editable certificate that we would like to personalise…

How to change the wording
To alter the specific wording in the document, click the end of the word you wish to alter. You will see a flashing black line. Now delete the wording you do not require and replace with your desired text.


How to change the FONT and letter size
To alter the font type and size of letters you must first select the word or sentence you wish to change. To do this a double-click will select a word and a fast triple-click will select the sentence. Once the word or sentence is selected you can alter the font size or type in the top left hand corner of Word.

For example: In changing the ‘Well Done’ part of this particular resource from John to Alison, I see that the words no longer fit…

…I triple-click to highlight the sentence…

…and change the font size from 60 to 48.
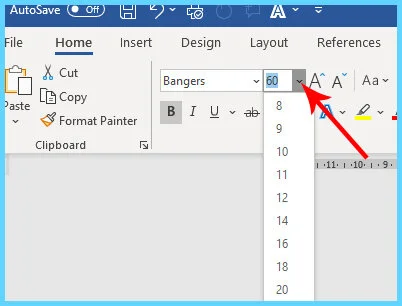
The sentence now fits.

How to move a text box
To move a text box, first click anywhere close to the text. This will bring up the dotted outline of the text box.

Click this dotted outline once and it will become a solid line.

Now click and hold on this line and you will be able to drag the box to a new position.
We hope this brief tutorial was useful! If you have any problems or questions, just send us an e-mail and we’ll do our best to help!
Thank-you for using Little Owls Resources!
Sara & Stu